Making Cartographically Accurate Rivers using High Resolution Elevation Data in ArcMap
This begins as a standard stream delineation process beginning with a Digital Elevation Model (DEM). I'll work it step by step and show you what I've got so you can work alongside me. I'll be using a DEM from my part of the world, near Sparta, Tennessee. You are free to use a DEM from wherever you like. Generally, the same process applies.
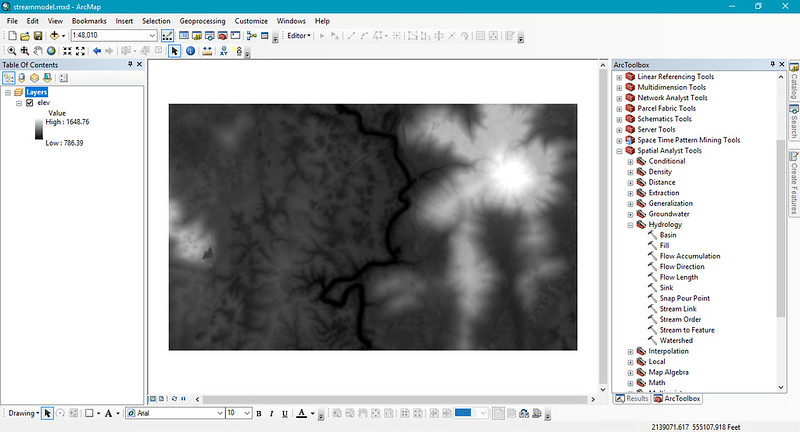
I'm using the new lidar derrived 2.5' DEMs and I'm looking at a segment of the Calfkiller River for this example. I have docked the toolbar menu and expanded Spatial Analyst > Hydrology. We'll be using a bunch of commands from there. I also have raster calculator added to my menu buttons on top, that will get some use as well. All the tools we use will be on their default settings unless otherwise stated. I follow the general naming conventions provided by the tools. You may find it useful to duplicate my naming strategy until you get a feel for it.
One final note about this technique is that so far I have only used it to work on small areas. It may not be ready to by employed large scale. Also, I developed this only as a cartographic technique. While it tends to match up with water in hi resolution aerial images I'm looking at, I would certainly hesitate before applying this to more meaningful work like flood modeling.
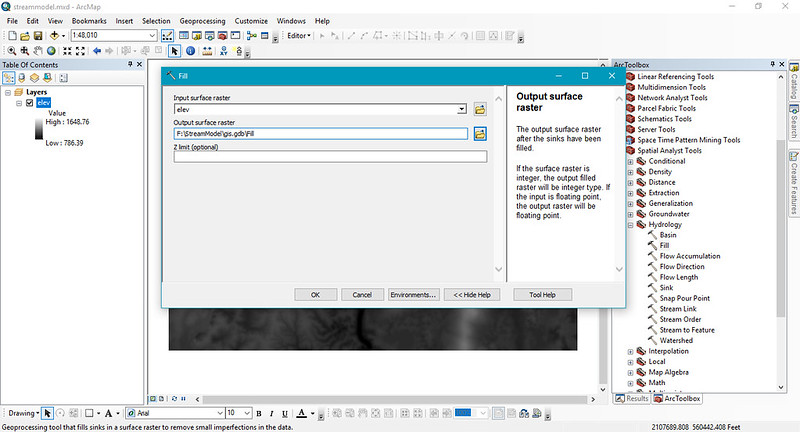
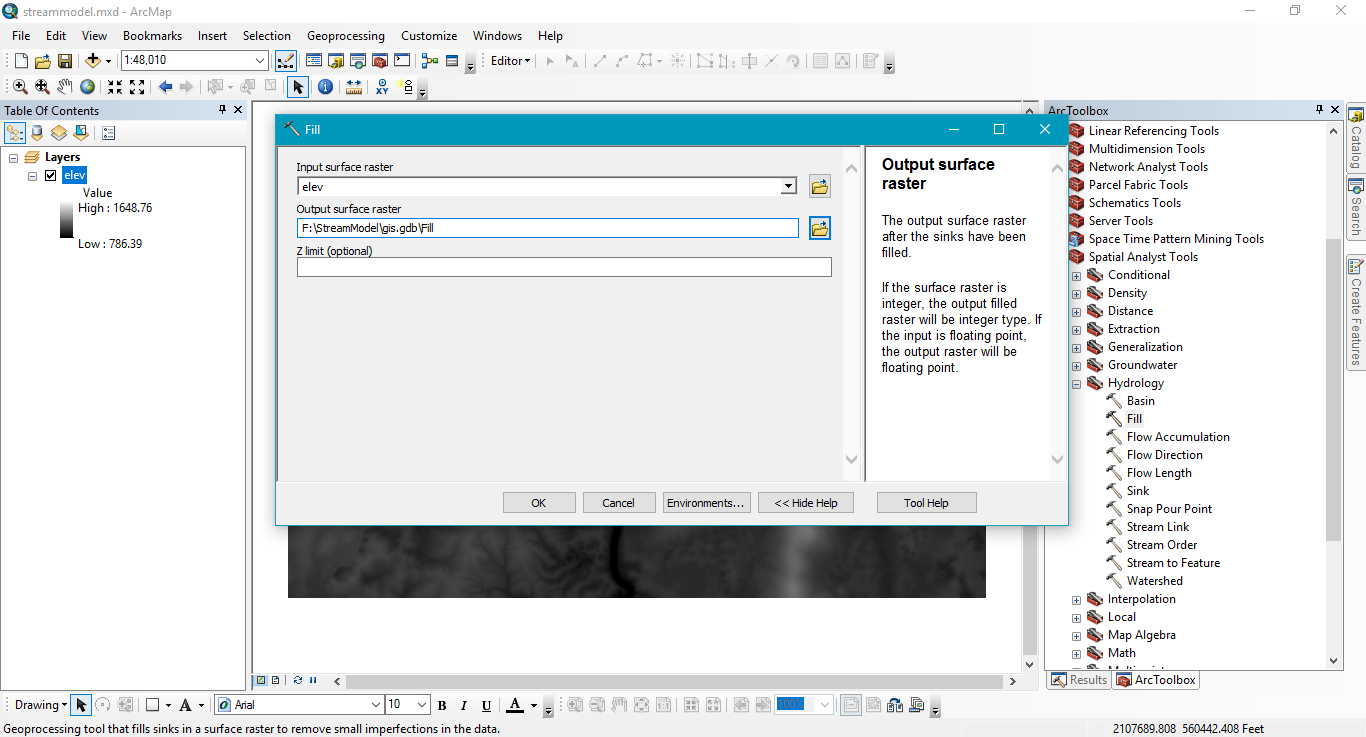
The first thing to do is the Fill function on your DEM to smooth it out and let water flow across it in a way that makes sense to a computer (by the way, this really doesn't work well in a karst basin like the Calfkiller, as you'll see momentarily).
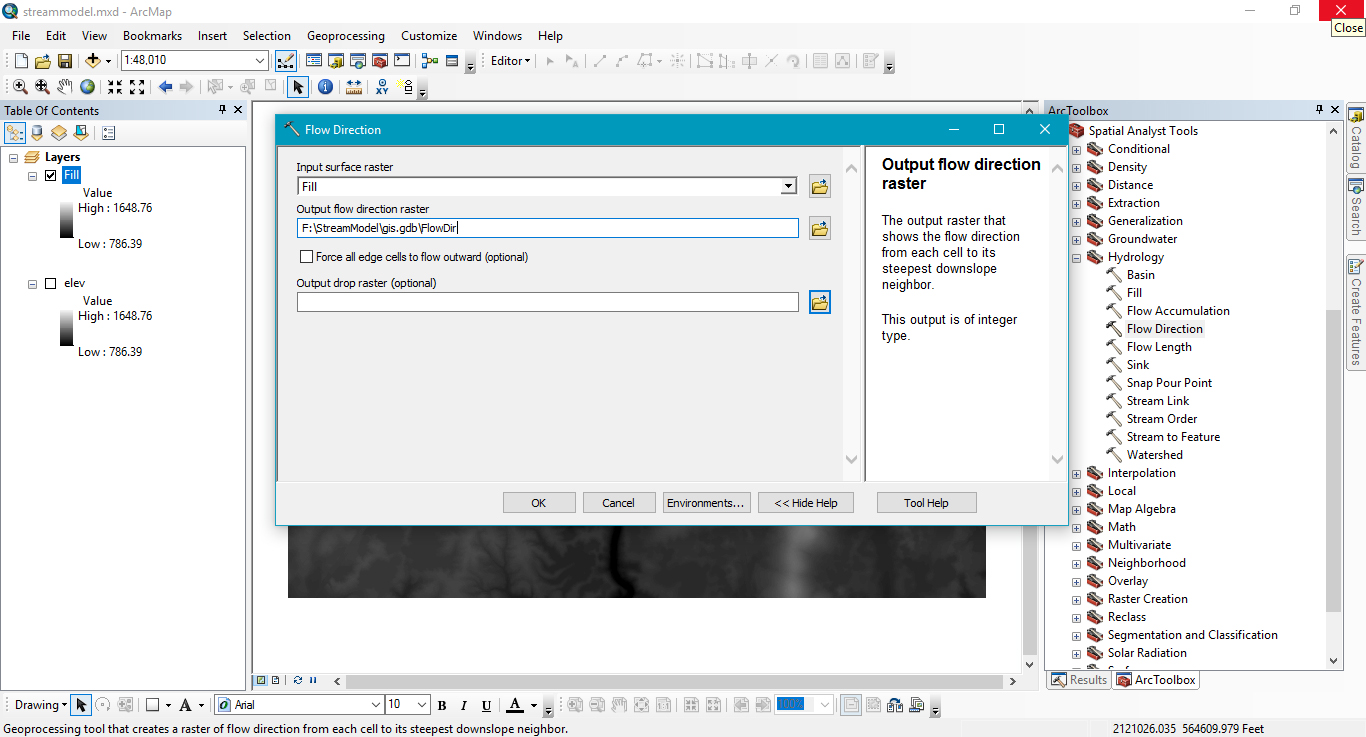
Once that is done, you'll run the command flow direction on the filled DEM. The flow direction output should only have numbers which are powers of 2. If you numbers which aren't, you've run flow direction on your original DEM, not the filled DEM.
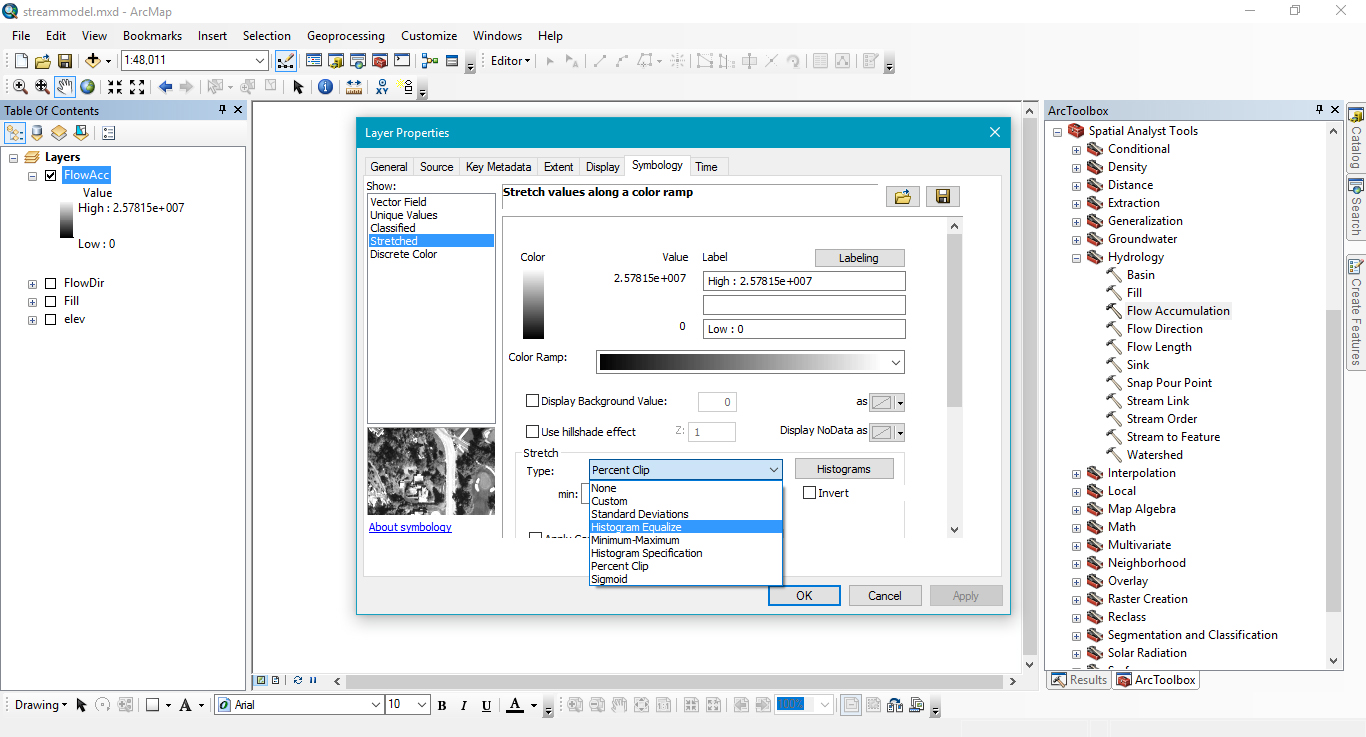
When you have the flow direction, you're ready to create run flow accumulation. This will begin to develop your stream networks. If this tool takes longer than the others to run, don't worry, that is normal. When it is done, I often go into the layer's properties under the symbology tab and change the stretch type to equalize. This will let you better see the stream networks.
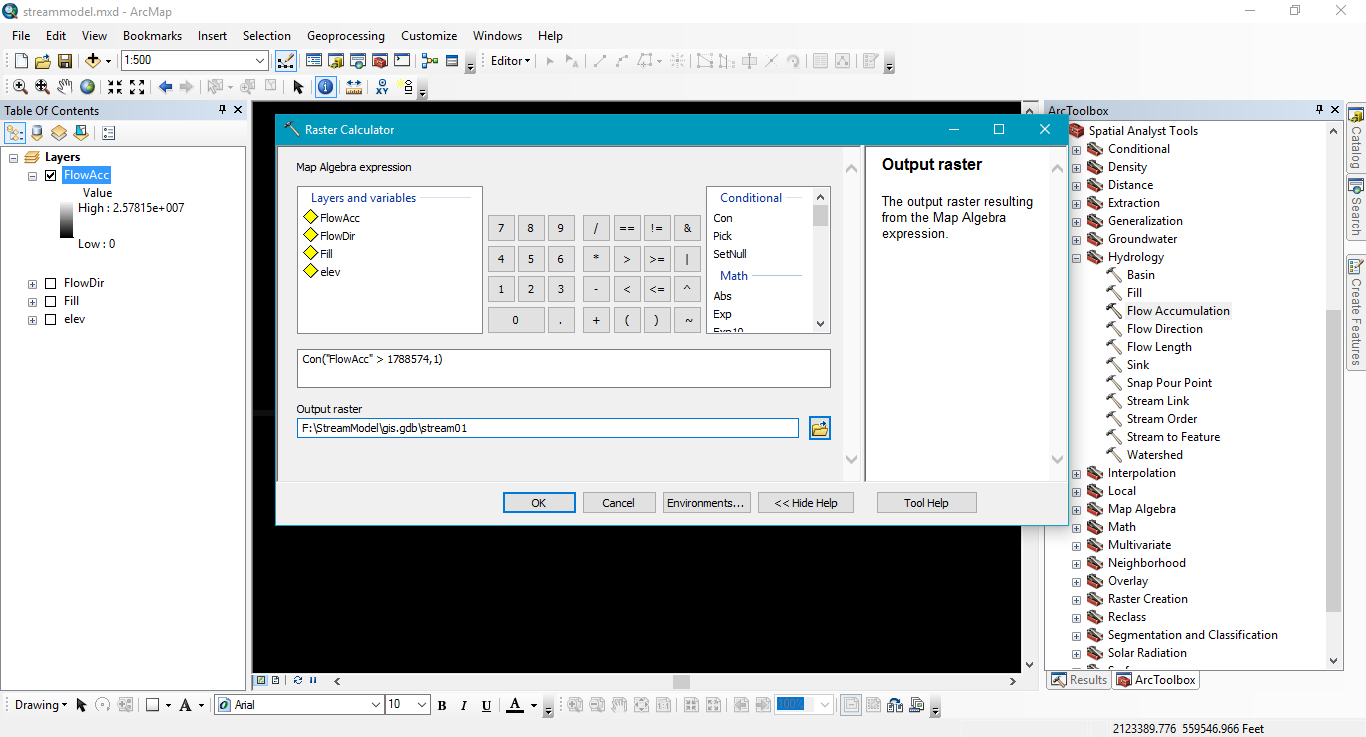
A few more steps and you'll be able to pull out and vectorize your stream networks. You have to make a decision about where streams begin in terms of value along your particular flow accumulation raster. There are lots of ways of going about determining this. Some of those methods are more empirical and academic than others. My method for cartography is simply eyeballing it. I use the identify tool to get the value of a pixel at a particular location, and I copy that value to the next step in Raster Calculator. What that pixel will represent is where the stream network will begin. No streams will appear upstream of it, in other words. In the picture below you can see that the expression I use is Con("FlowAcc" > 1788574,1). The odd value is where I used the identify tool to get the value of the Flow Accumulation raster at the point where I wanted the stream to begin.
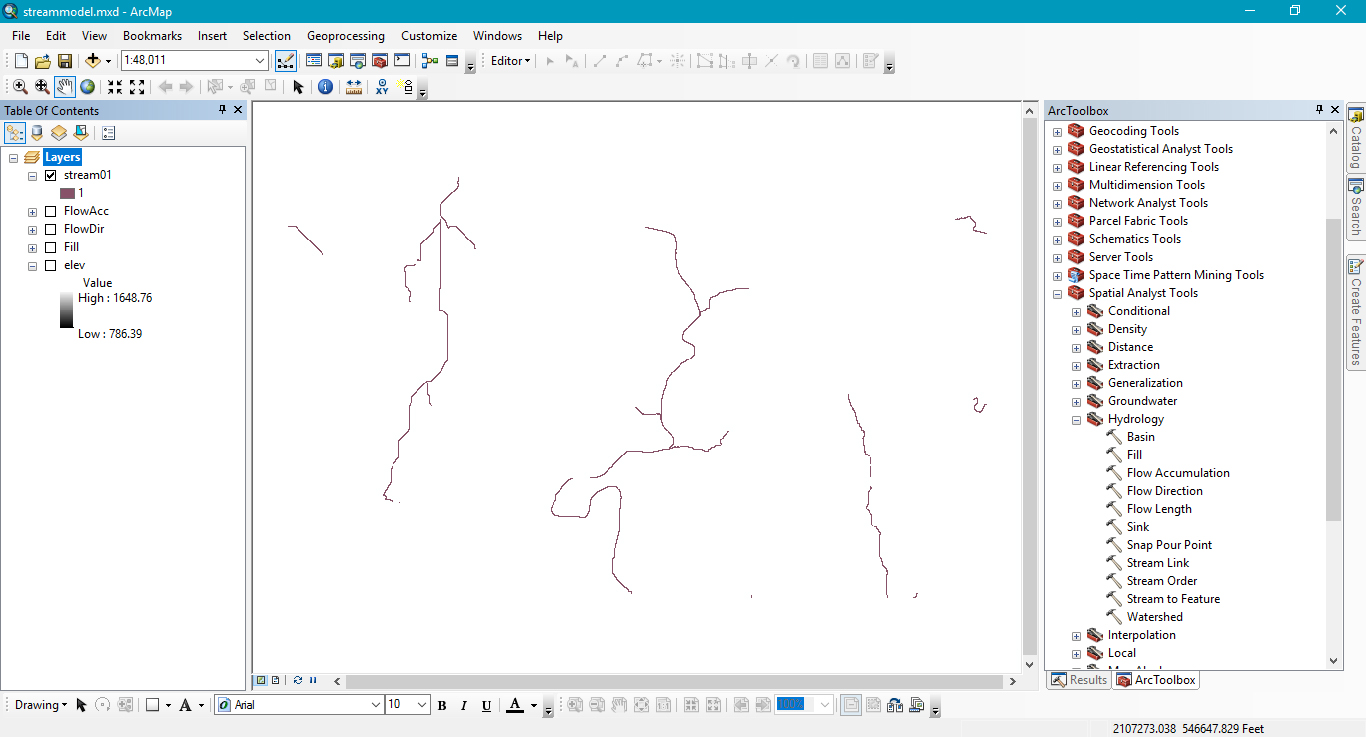
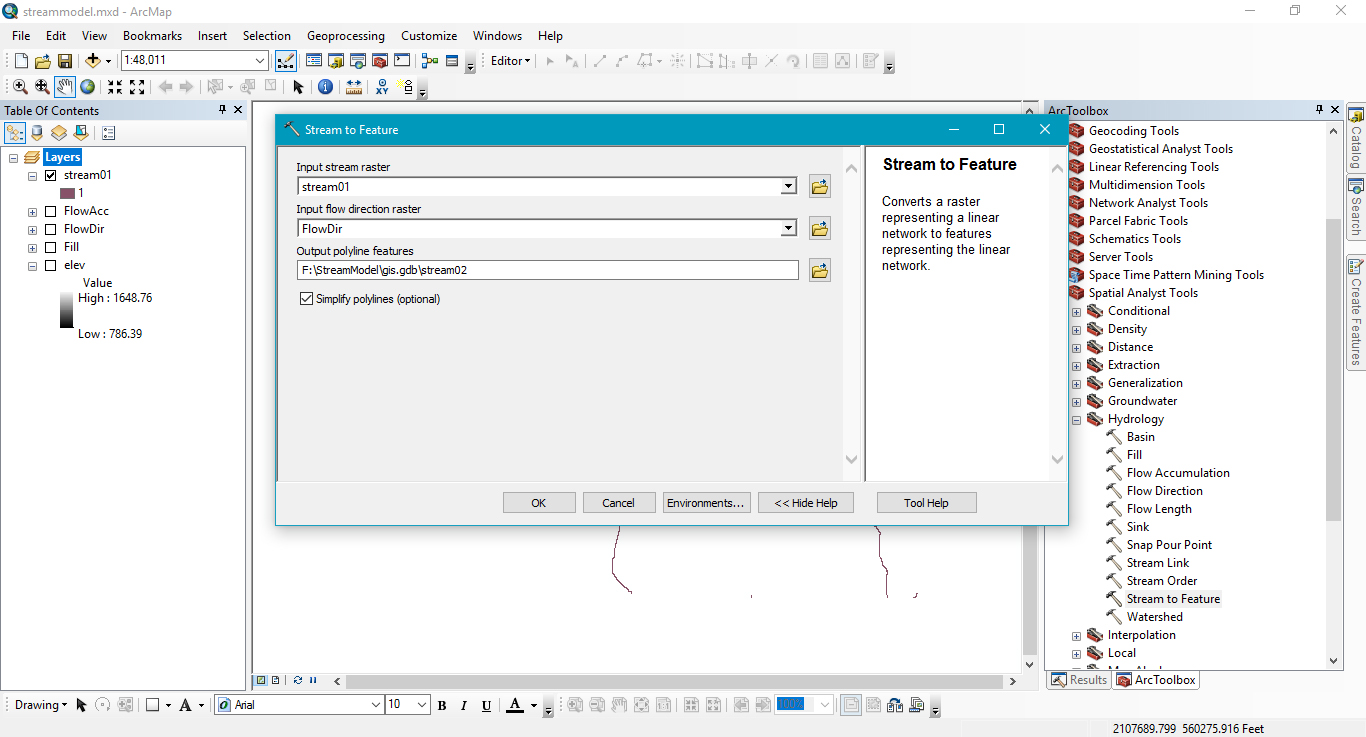
Now that you've got a raster stream layer, you should convert it to a vector stream layer. Use the Stream to Feature tool as shown below.
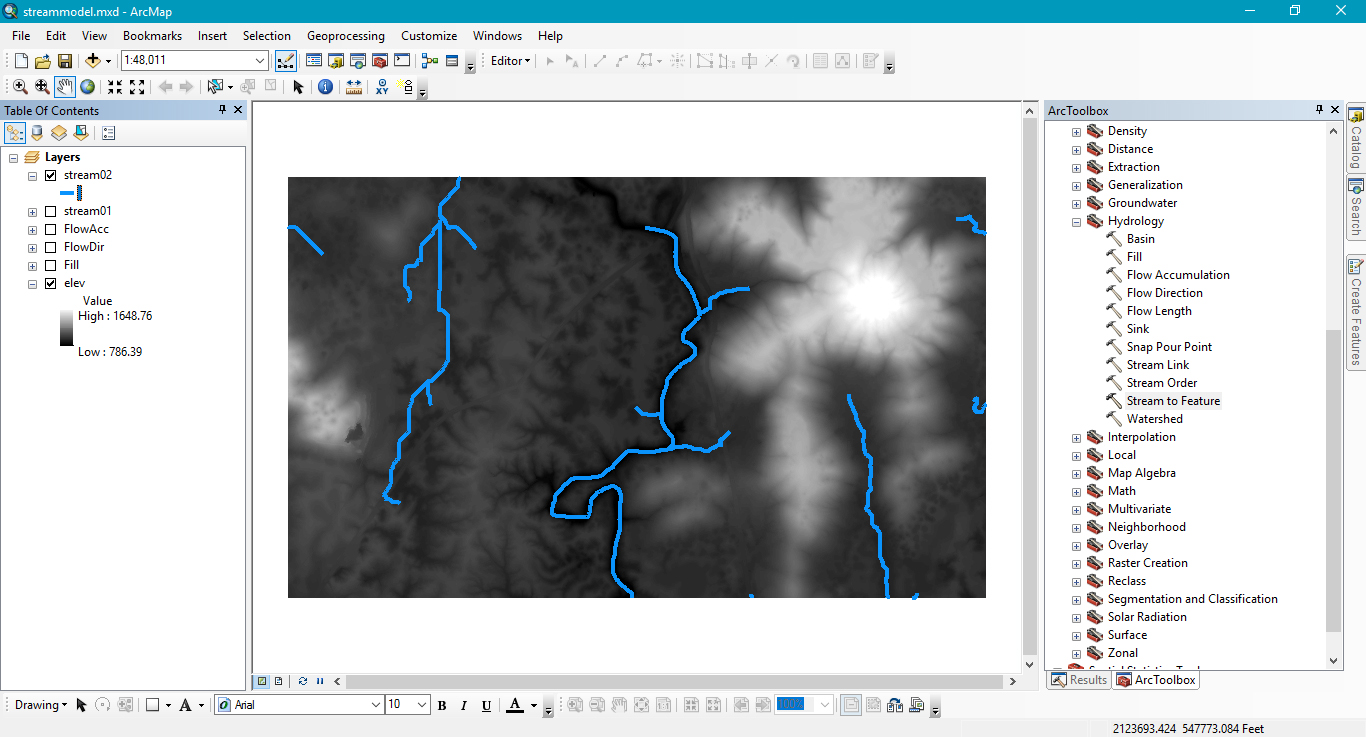
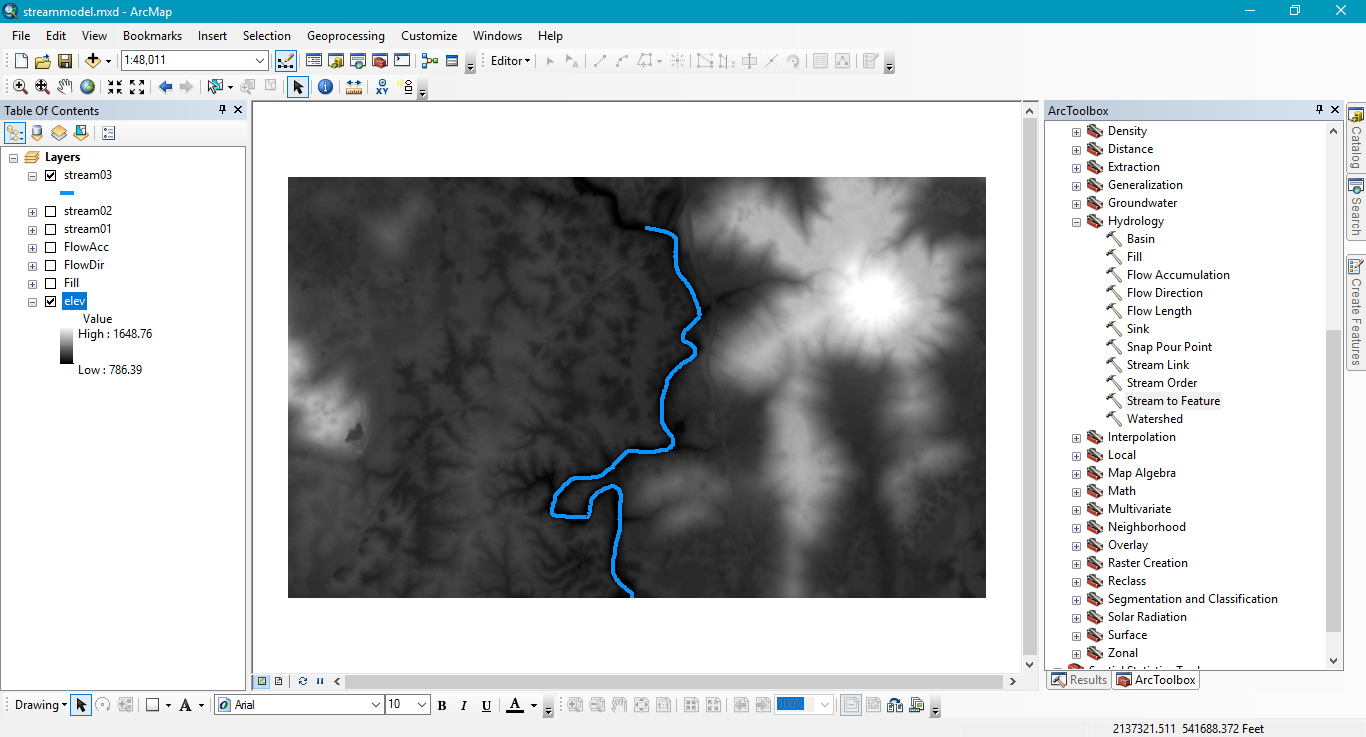
Your streams are vectors now. In my part of the world there are lots of rivers that flow underground because of karst. I'm going to do a reality check and remove those.
Using the editor tool I've deleted all the line segments that I know aren't flowing on the surface. There, that looks better.
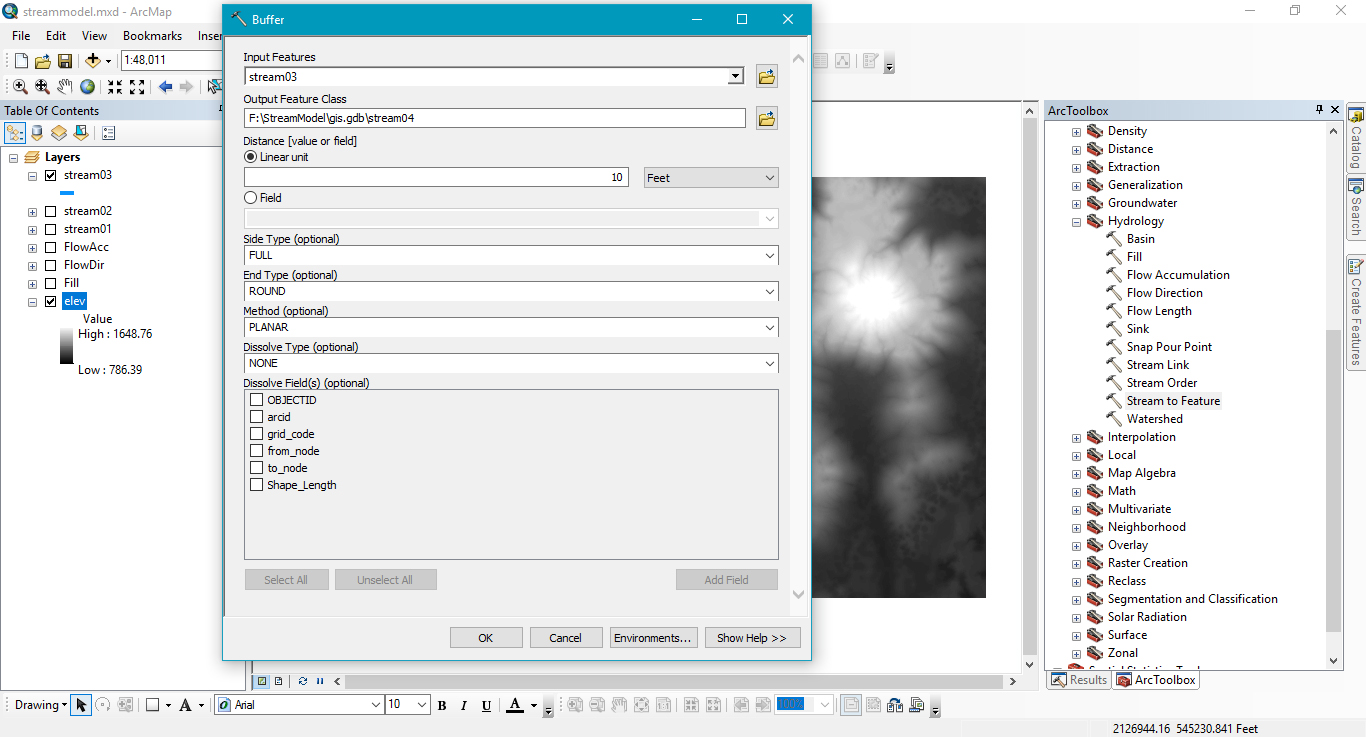
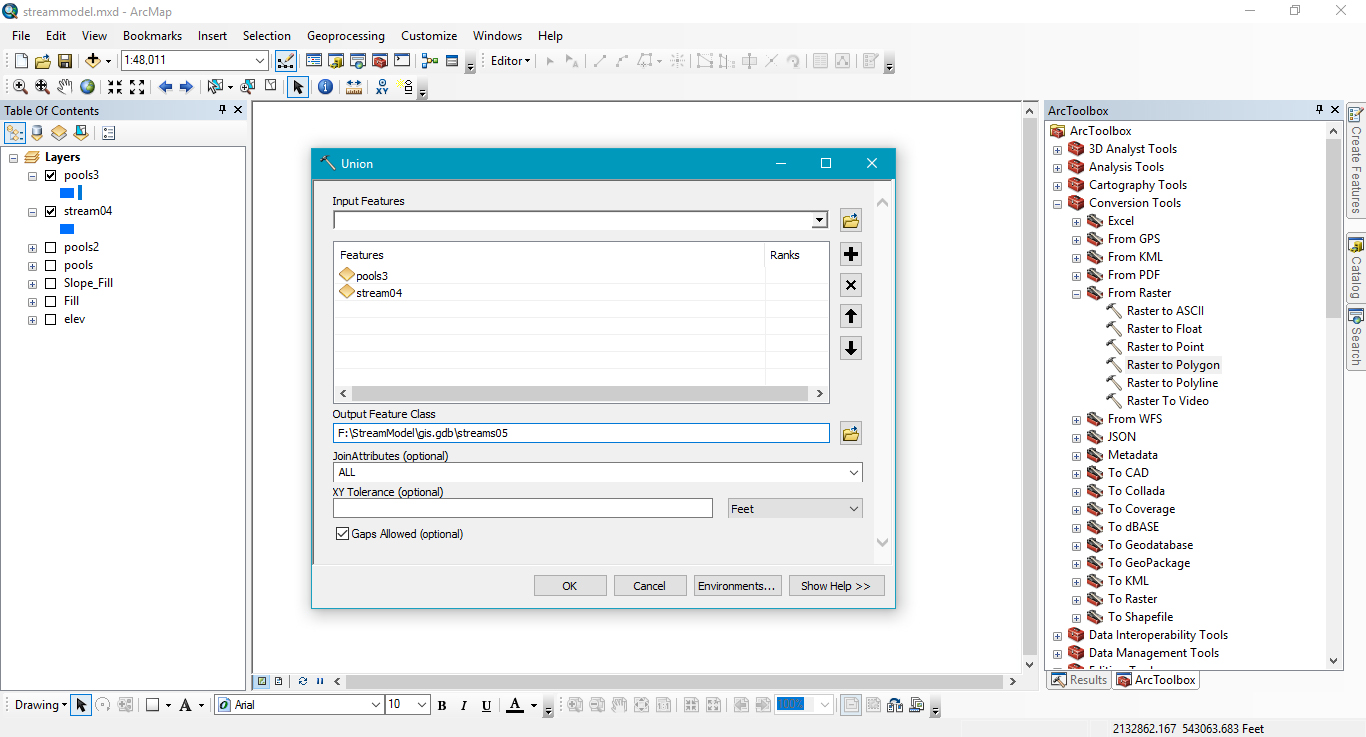
The next part of this workflow will require that we buffer the line slightly. We want it to be a polygon so that we can later union it with the next batch of data we produce. I'm going to buffer the line by ten feet, which is again, a completely arbitrary number. After you've worked through this once with your data, you can see how it looks and adjust that number accordingly.
Go ahead and remove Stream03, Stream02, Stream01, FlowAcc, and FlowDir from the data frame, we will no longer be needing those.
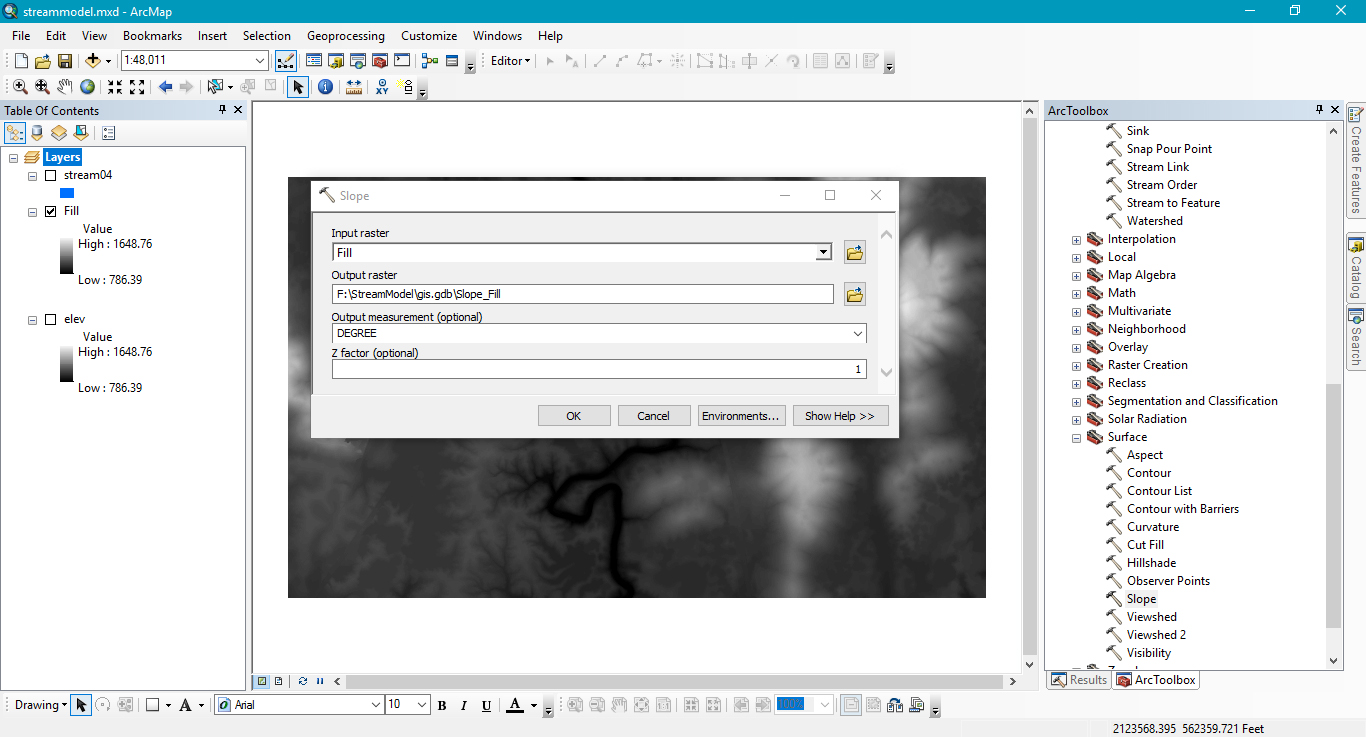
Run the Slope tool on the Fill layer, and then we want to get at the areas of the slope_fill that are less than 2%. This will help us identify where water could be pooling on the landscape. Again, my area is karst heavy, and the results of these steps will identify lots of false positives, while yours may not. See the next few pictures on how to do these steps.
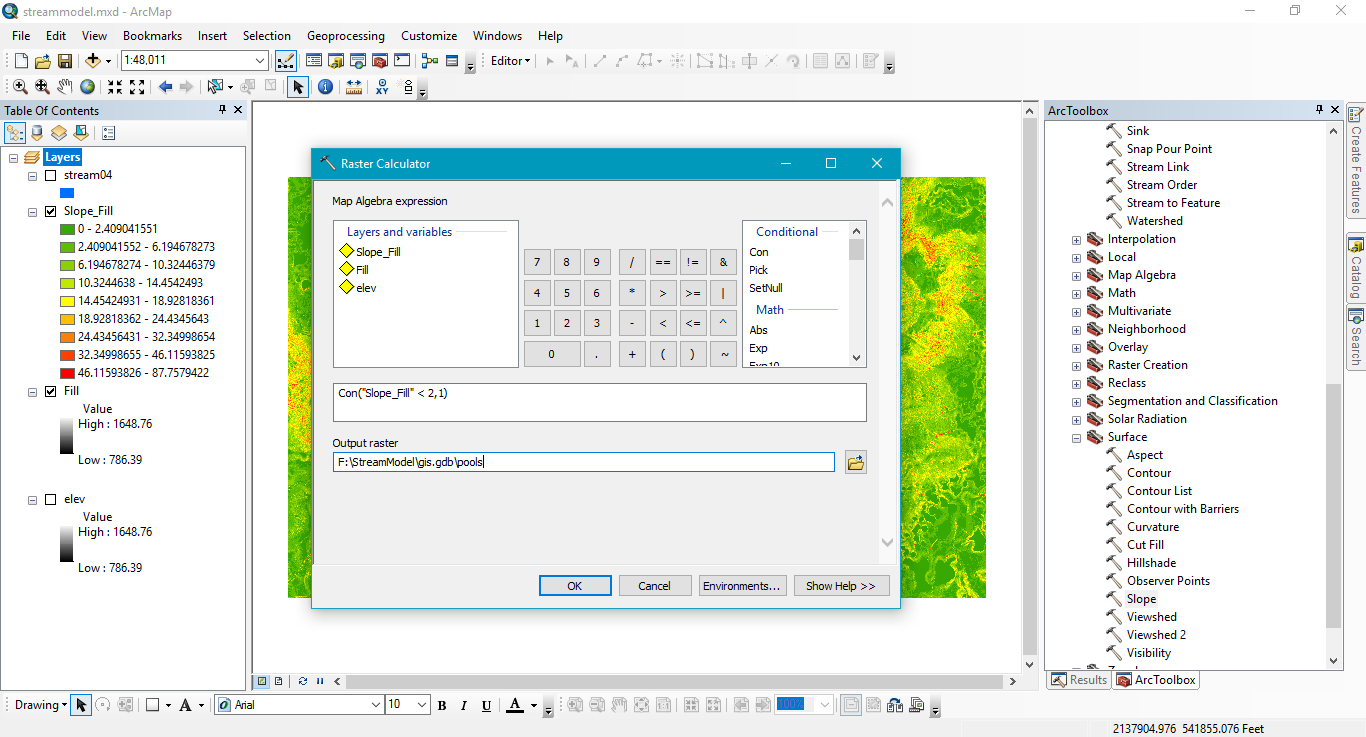
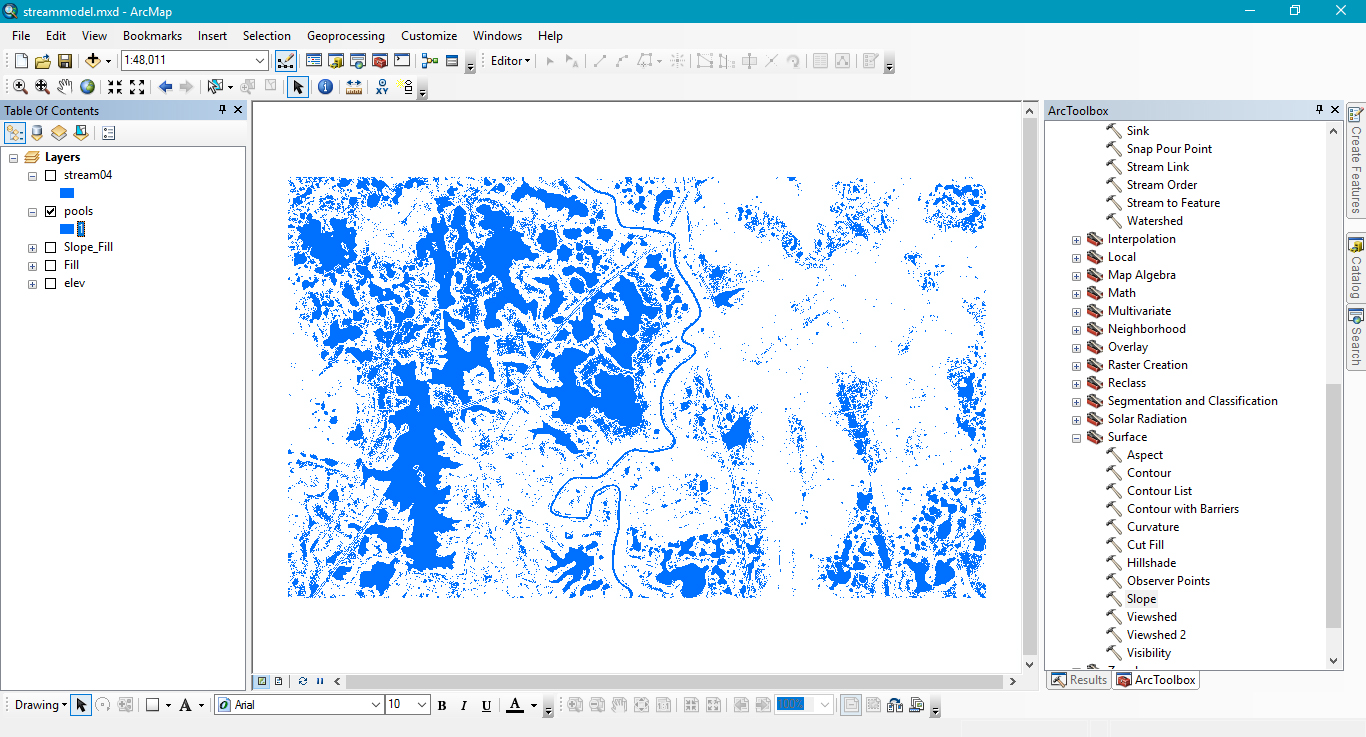

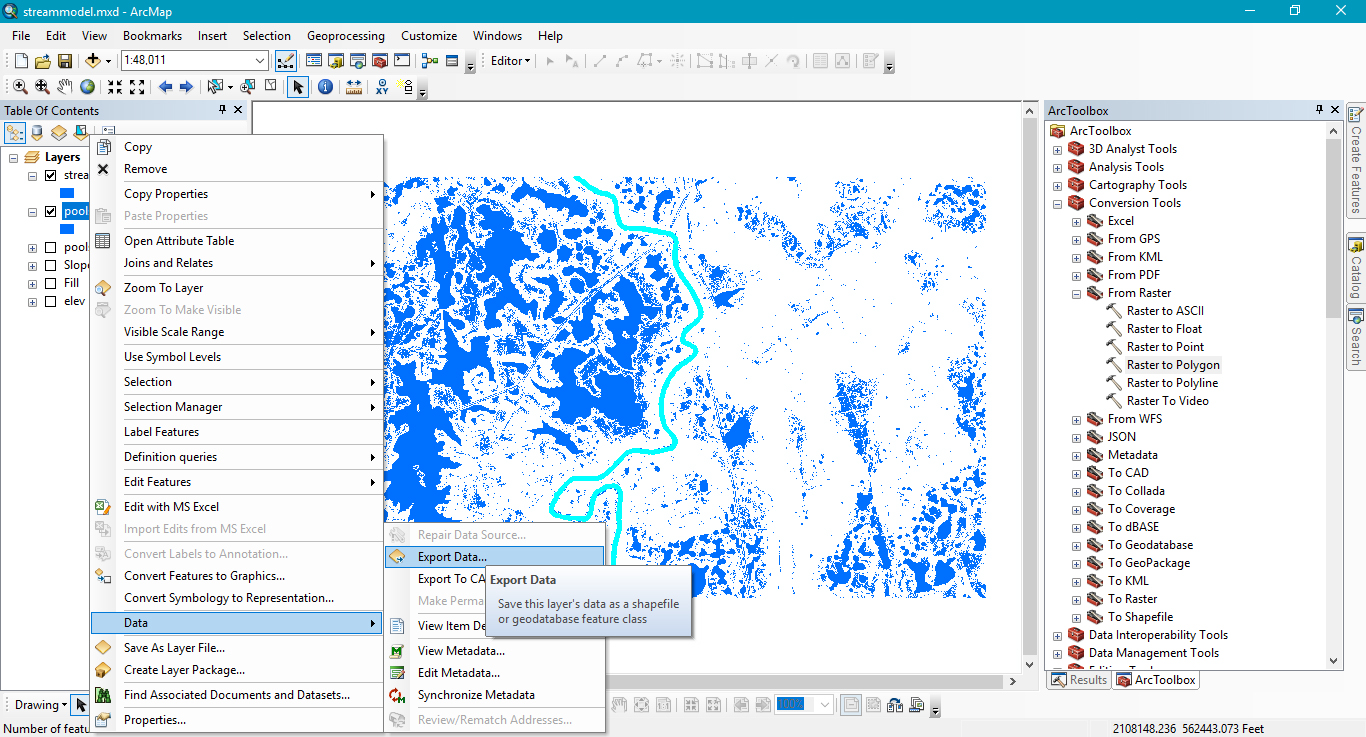
Time for another reality check. Those sinkhole aren't actually lakes. I am only interested in the river channel. So we'll need to turn this into a vector layer so we can grab only what we need. The next few images will show how I do that.

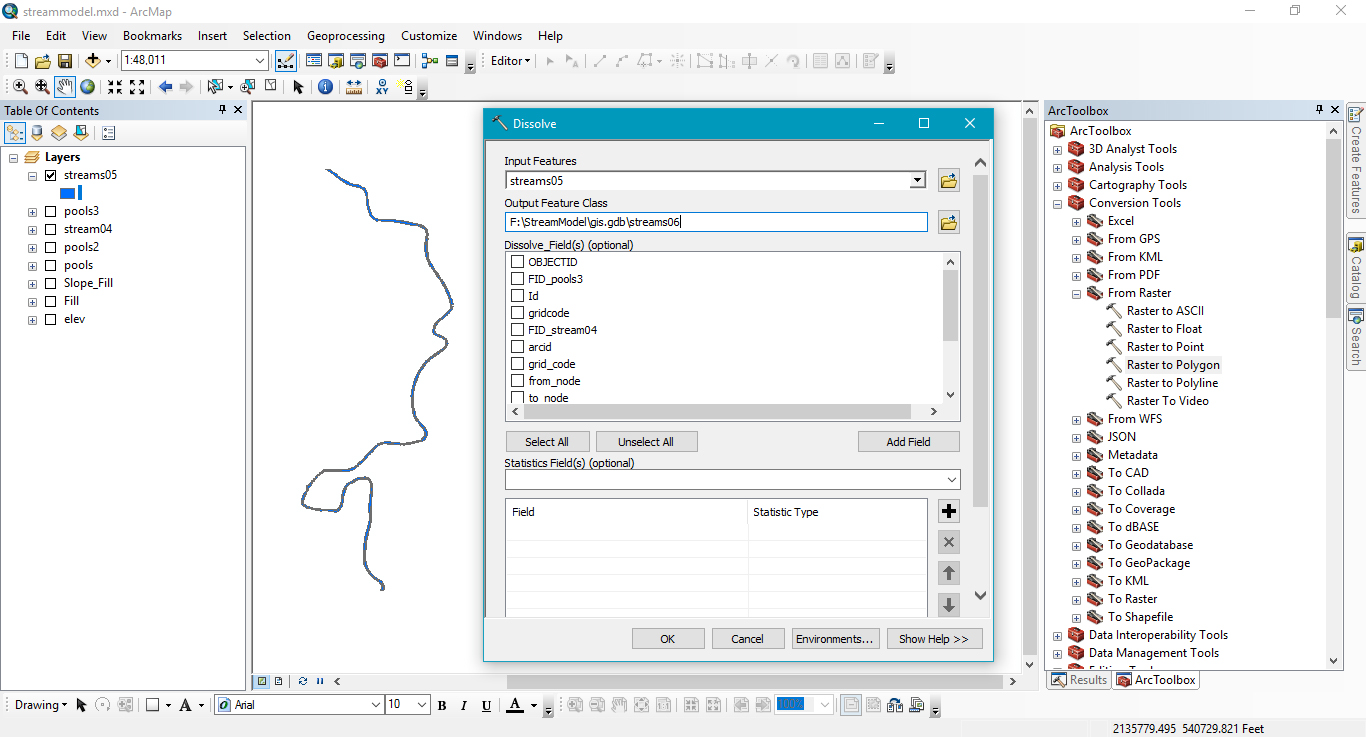
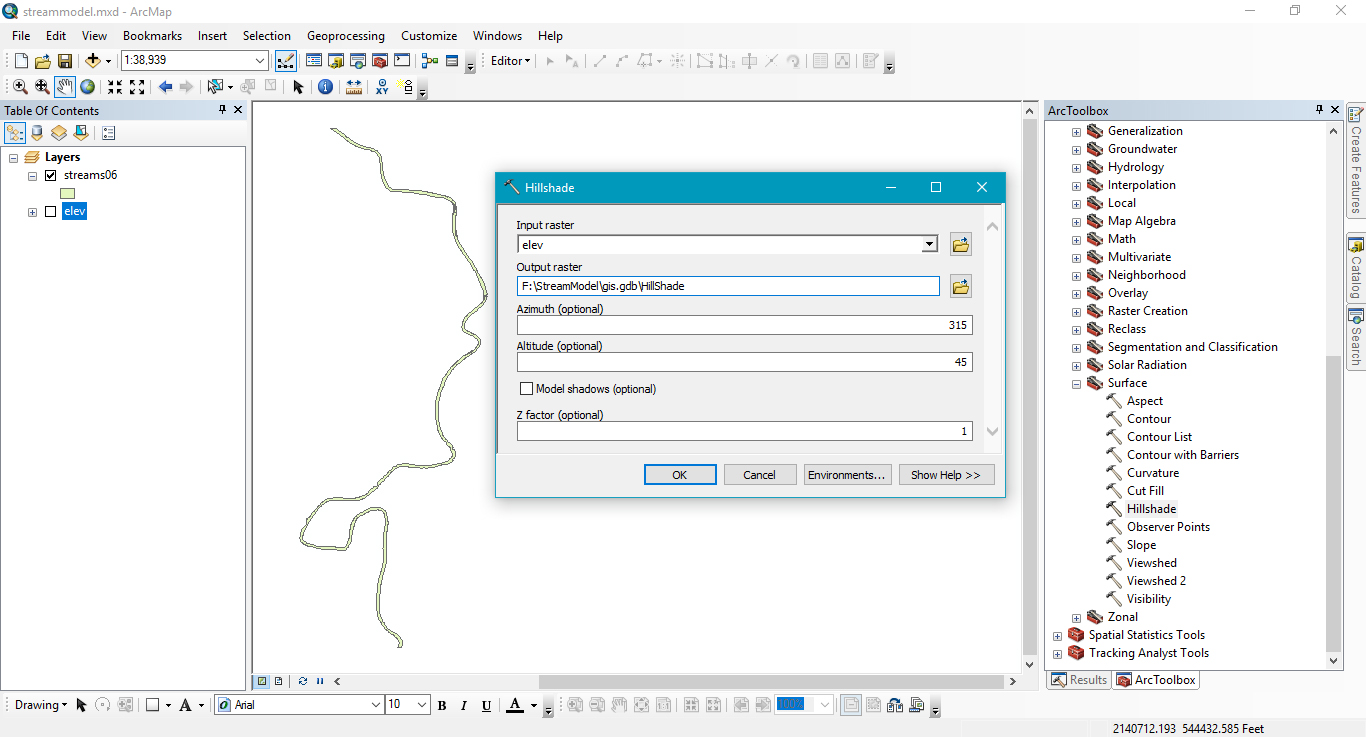
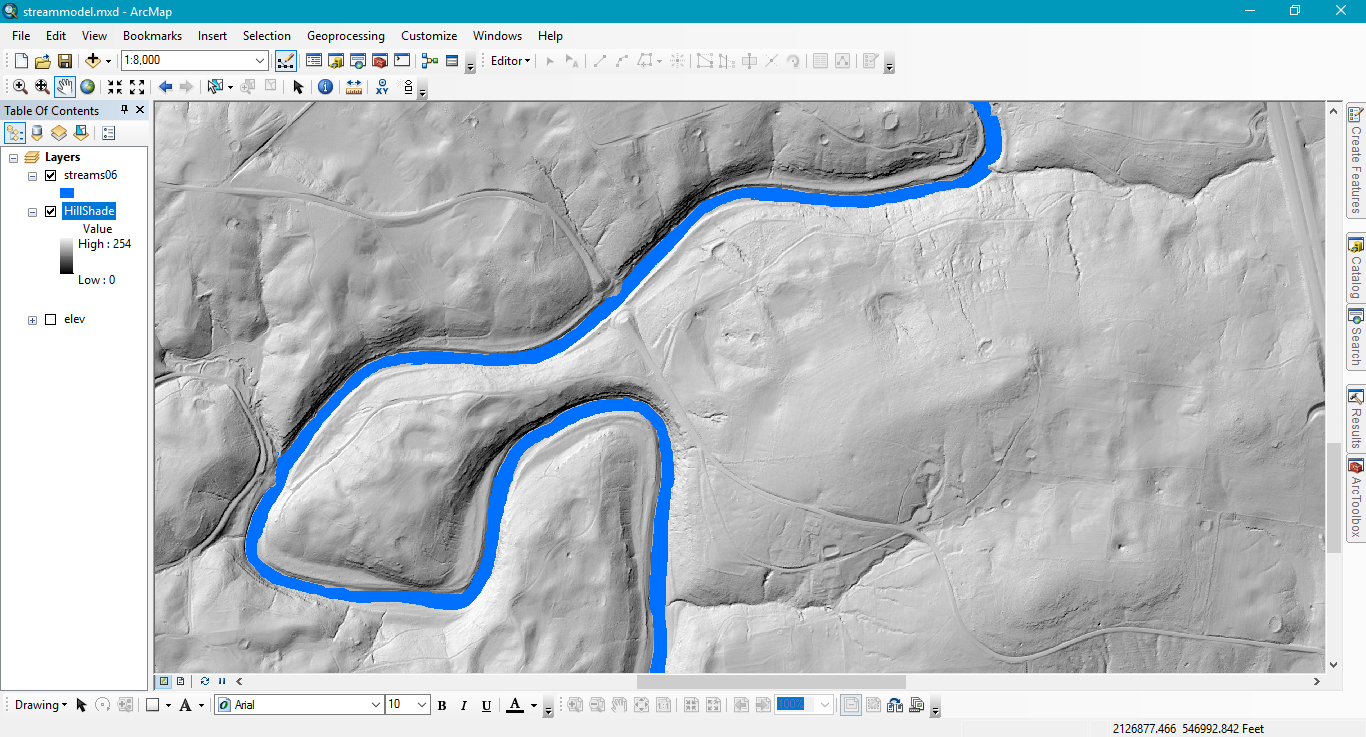
Get rid of everything but Streams06 and Elev. You'll want to do a hillshade to see how the streams look against a more realistic landscape.

I think that looks pretty good. I hope that you found it helpful. If you have any tweaks, secrets, comments, or questions I'm happy to talk with you.
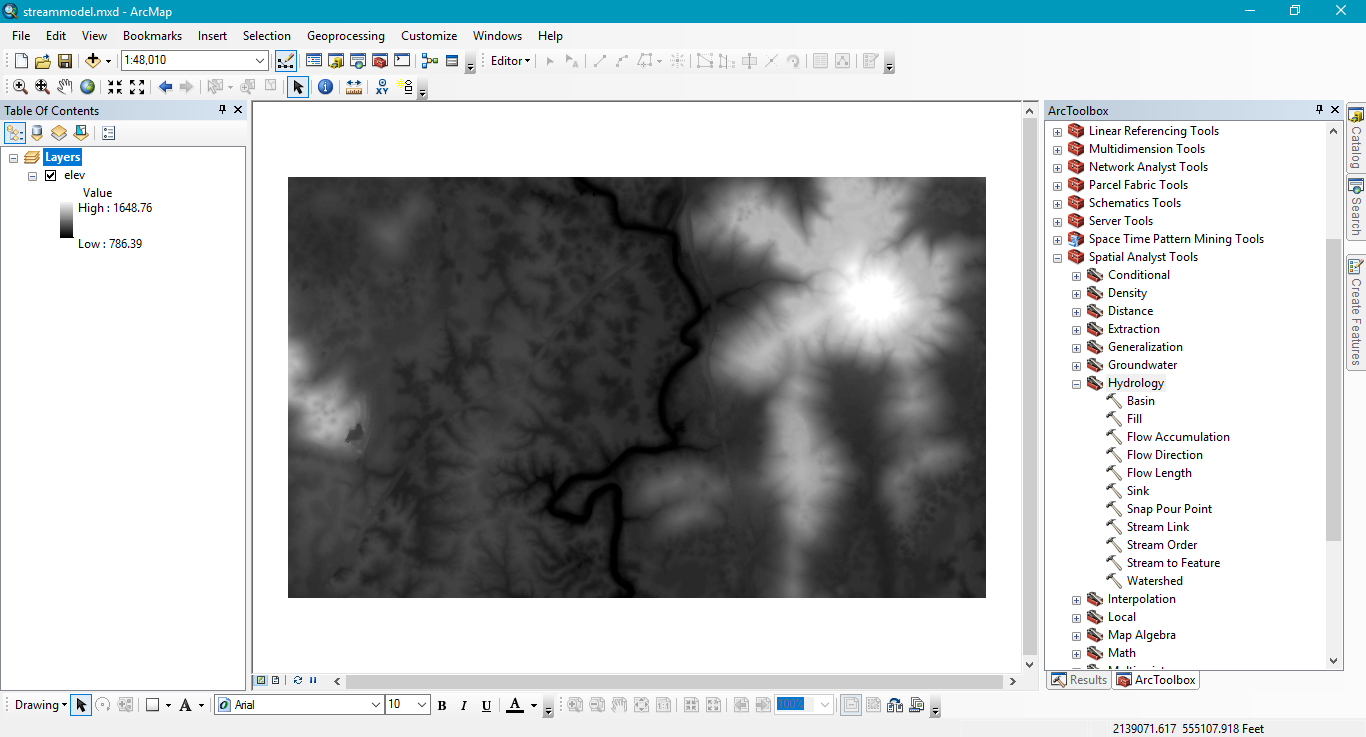
I'm using the new lidar derrived 2.5' DEMs and I'm looking at a segment of the Calfkiller River for this example. I have docked the toolbar menu and expanded Spatial Analyst > Hydrology. We'll be using a bunch of commands from there. I also have raster calculator added to my menu buttons on top, that will get some use as well. All the tools we use will be on their default settings unless otherwise stated. I follow the general naming conventions provided by the tools. You may find it useful to duplicate my naming strategy until you get a feel for it.
One final note about this technique is that so far I have only used it to work on small areas. It may not be ready to by employed large scale. Also, I developed this only as a cartographic technique. While it tends to match up with water in hi resolution aerial images I'm looking at, I would certainly hesitate before applying this to more meaningful work like flood modeling.
The first thing to do is the Fill function on your DEM to smooth it out and let water flow across it in a way that makes sense to a computer (by the way, this really doesn't work well in a karst basin like the Calfkiller, as you'll see momentarily).
Once that is done, you'll run the command flow direction on the filled DEM. The flow direction output should only have numbers which are powers of 2. If you numbers which aren't, you've run flow direction on your original DEM, not the filled DEM.
When you have the flow direction, you're ready to create run flow accumulation. This will begin to develop your stream networks. If this tool takes longer than the others to run, don't worry, that is normal. When it is done, I often go into the layer's properties under the symbology tab and change the stretch type to equalize. This will let you better see the stream networks.
A few more steps and you'll be able to pull out and vectorize your stream networks. You have to make a decision about where streams begin in terms of value along your particular flow accumulation raster. There are lots of ways of going about determining this. Some of those methods are more empirical and academic than others. My method for cartography is simply eyeballing it. I use the identify tool to get the value of a pixel at a particular location, and I copy that value to the next step in Raster Calculator. What that pixel will represent is where the stream network will begin. No streams will appear upstream of it, in other words. In the picture below you can see that the expression I use is Con("FlowAcc" > 1788574,1). The odd value is where I used the identify tool to get the value of the Flow Accumulation raster at the point where I wanted the stream to begin.
Now that you've got a raster stream layer, you should convert it to a vector stream layer. Use the Stream to Feature tool as shown below.
Your streams are vectors now. In my part of the world there are lots of rivers that flow underground because of karst. I'm going to do a reality check and remove those.
Using the editor tool I've deleted all the line segments that I know aren't flowing on the surface. There, that looks better.
The next part of this workflow will require that we buffer the line slightly. We want it to be a polygon so that we can later union it with the next batch of data we produce. I'm going to buffer the line by ten feet, which is again, a completely arbitrary number. After you've worked through this once with your data, you can see how it looks and adjust that number accordingly.
Go ahead and remove Stream03, Stream02, Stream01, FlowAcc, and FlowDir from the data frame, we will no longer be needing those.
Run the Slope tool on the Fill layer, and then we want to get at the areas of the slope_fill that are less than 2%. This will help us identify where water could be pooling on the landscape. Again, my area is karst heavy, and the results of these steps will identify lots of false positives, while yours may not. See the next few pictures on how to do these steps.
Time for another reality check. Those sinkhole aren't actually lakes. I am only interested in the river channel. So we'll need to turn this into a vector layer so we can grab only what we need. The next few images will show how I do that.
Get rid of everything but Streams06 and Elev. You'll want to do a hillshade to see how the streams look against a more realistic landscape.
I think that looks pretty good. I hope that you found it helpful. If you have any tweaks, secrets, comments, or questions I'm happy to talk with you.


Comments