Creating a Noise Profile and using it as a Mask in Photoshop
I have a bunch of old photographs which are very noisy, but are still of interest to me. In the reprocessing of these images with better tools and a better eye I've developed a simple way to create a mask to apply noise smoothing to a portion of the image.
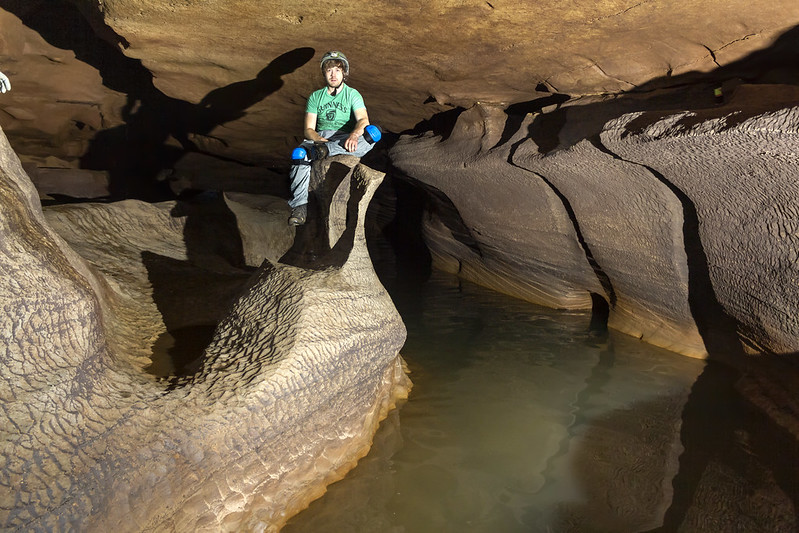
My goal is to create the following image. Click the image to load its Flickr page and click the image again to magnify it. It's not a perfect image, but the noisy parts of the image have been smoothed, and the parts of the image which aren't noisy haven't been, which allows them to retain their detail.
 What I am calling the noise profile is simply the difference between the original image and a noise reduced version of the image with a little bit of modification. If you would like to follow along, find an image of your own with noise in it. I'm using the latest version of Adobe Photoshop CS for the PC (10/25/2019).
First, let's load our image. Here's what mine looks like.
 I usually start by hitting the auto button and then fine tuning the image from there. Let's see what auto does.

 Go ahead an open your image so you can use the standard Adobe Photoshop interface. I always do an auto-contrast to snap my highs and lows into place and balance out the middle luminosity values. Next, let's duplicate the original layer by clicking and dragging Background down to the Create New Layer button in the Layer toolbar.
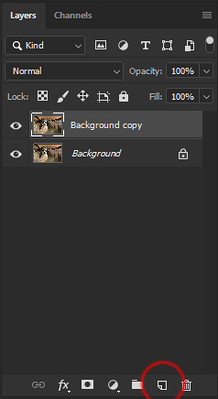 You should have two layers now. Make sure Background copy is active, and let's bring it back into the Camera Raw dialog by clicking the Filter menu and selecting Camera Raw Filter. Choose the details menu in the right pane and crank Luminance to 100 and Color to 50. Click OK.
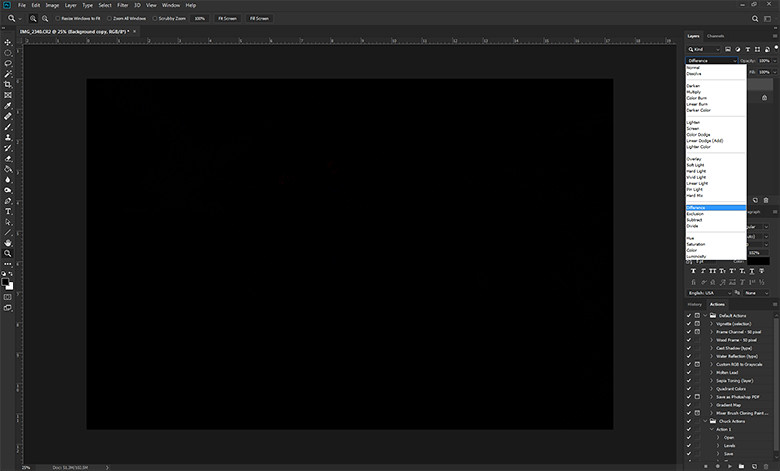
 Now your Background copy layer is noise smoothed, and your original isn't. The next step is to figure out where the noise is programmatically. Fortunately some basic raster math options are available in Photoshop. Change the overlay method on the right to difference and it should make your image black. This is what we want to happen. Right now we're asking "What's the difference between the regular image and the noise smoothed image?" It turns out that the answer at this resolution is difficult to see. We'll fix that in just a moment.
 Choose the square marque tool from the toolbar on the left and hit ctrl-a to select the entire image. You should have a marquee around the entire image. Let's use the copy merged command from the edit toolbar to copy the combination of these layers into the clipboard. Immediately paste the resulting layer into the workspace. It will appear as Layer 1.
Navigate to Image > Adjustments > Desaturate. The image > auto-contrast. Now you should see something like this.
 Next, navigate to Filter > Blur > Gaussian Blur and set the radius to 12 pixels. Hit OK, and do another auto-contrast.
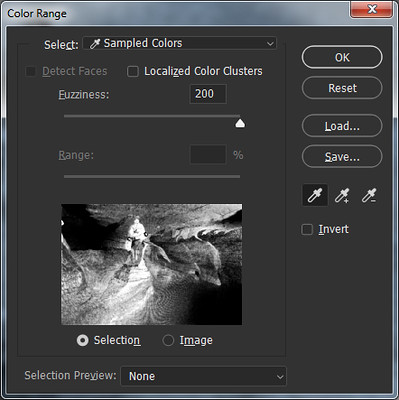
 From this image we can create our mask. Make sure your primary color is set to black, then navigate to Select > Color Range and and set the fuzziness to 200.
 Select Background copy now as your active layer. Toggle off Layer 1, and return the overlay method of Background copy to Normal. Your marquee selection should still be active.
 Hit ctrl-x to remove the selected marquee. If we turn off the background layer then you can see what your noise mask looks like on the image.
 Toggle the visibility back on for the background layer and flatten the image. Finish with another auto-contrast and you have your noise smoothed image. Oh, let's check that original area's noise now.
 Not perfect, but a far cry better than the original. I hope you found this useful. If you use this, let me know in the comments below. :)
My goal is to create the following image. Click the image to load its Flickr page and click the image again to magnify it. It's not a perfect image, but the noisy parts of the image have been smoothed, and the parts of the image which aren't noisy haven't been, which allows them to retain their detail.
First, let's load our image. Here's what mine looks like.
Let's take a look around our images and find some places with lots of noise. In the lower right of my image, in the dim portions

That's an issue. I'm going to make note of where this is and come back to it later. For now I'm going to do some spot exposure adjustments to darken some areas and maybe lighten a few other areas a wee bit. Here's what I've got now.
Navigate to Image > Adjustments > Desaturate. The image > auto-contrast. Now you should see something like this.


Comments